Azure Profile Sources (Legacy)
Configuring Azure AD as a Profile Source
Navigate to the Azure source by following the following path:
Application settings | Manage People | Manage Profile Sources
Select Microsoft Azure, this will take you to the first step of the Azure configuration wizard.
The following can be found within Azure and are required to setup user synchronisation.
App ID
App Secret
Directory ID
Registering an Application within Azure
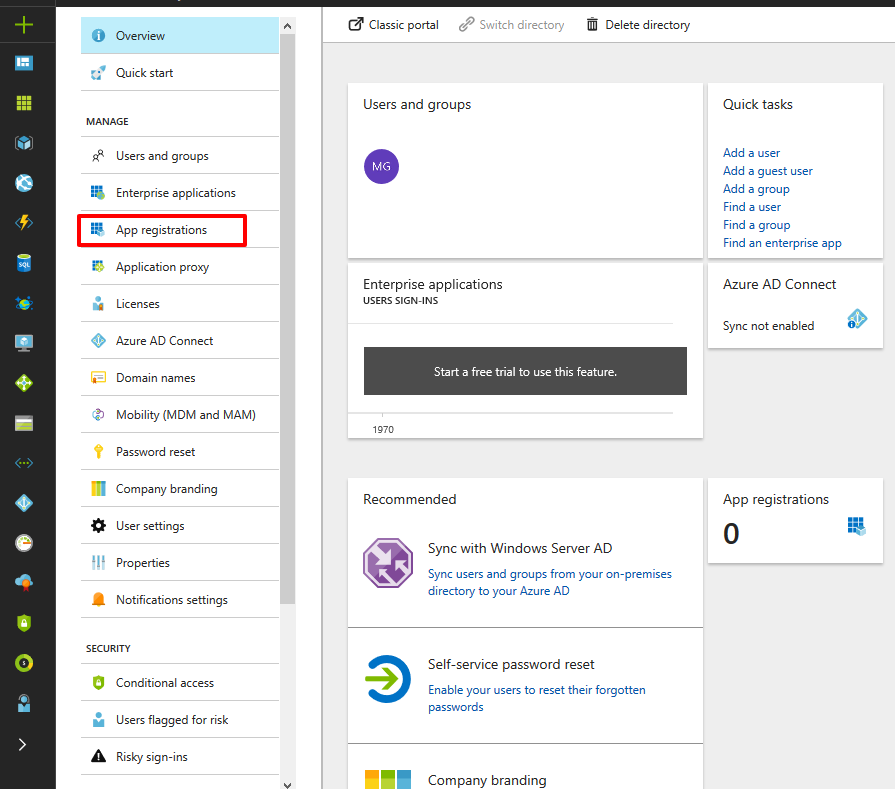
The first step of configuring Azure is to create/register a new application within your Azure environment. Navigate to App registrations and select 'New application registration'.
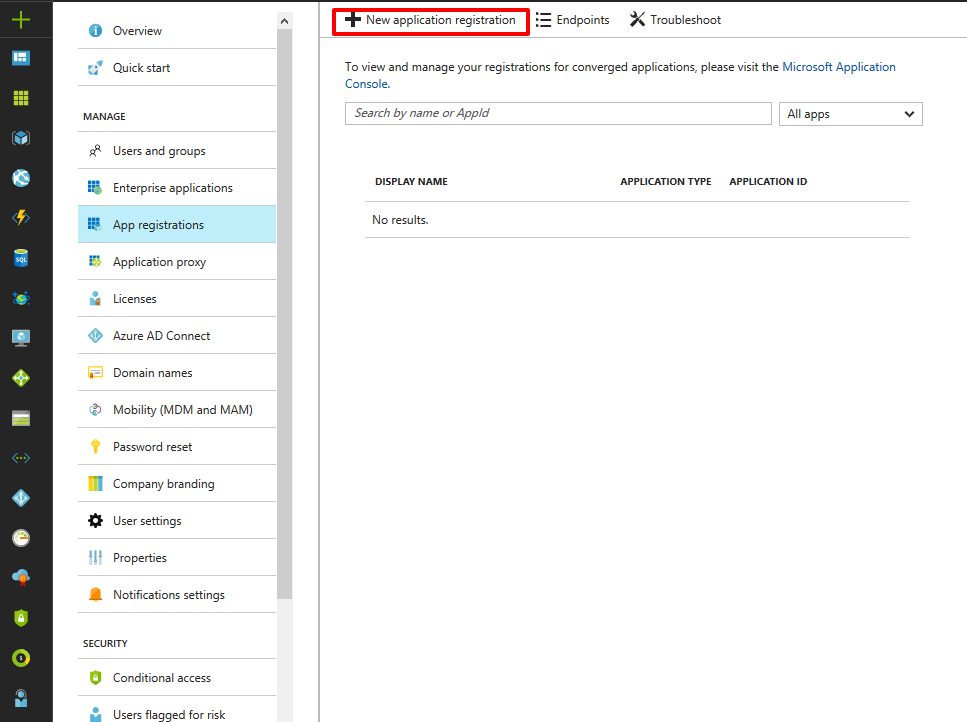
You are now required to enter an application name, this could be the name of your intranet or 'Interact'.
You are also required to enter the sign-on URL for your intranet e.g. [intranetname.interactgo.com].

Getting the App ID from Azure
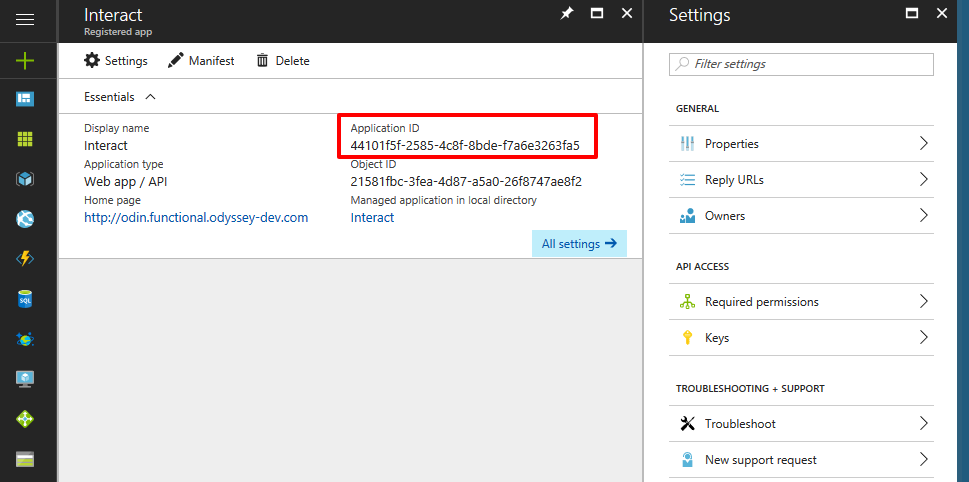
When navigating to the app, you can copy the Application ID as seen below:
Getting the App Secret from Azure
When navigating to the app, you can access the 'Keys' area, you need to add a description, and set a key expiry and save the key. We recommend that it is set to 'Never Expires' however this can be set to the frequency desired by your organisation. Once saved copy the value shown below, and add this to the App Secret field within Interact.

Getting the App ID URL from Azure
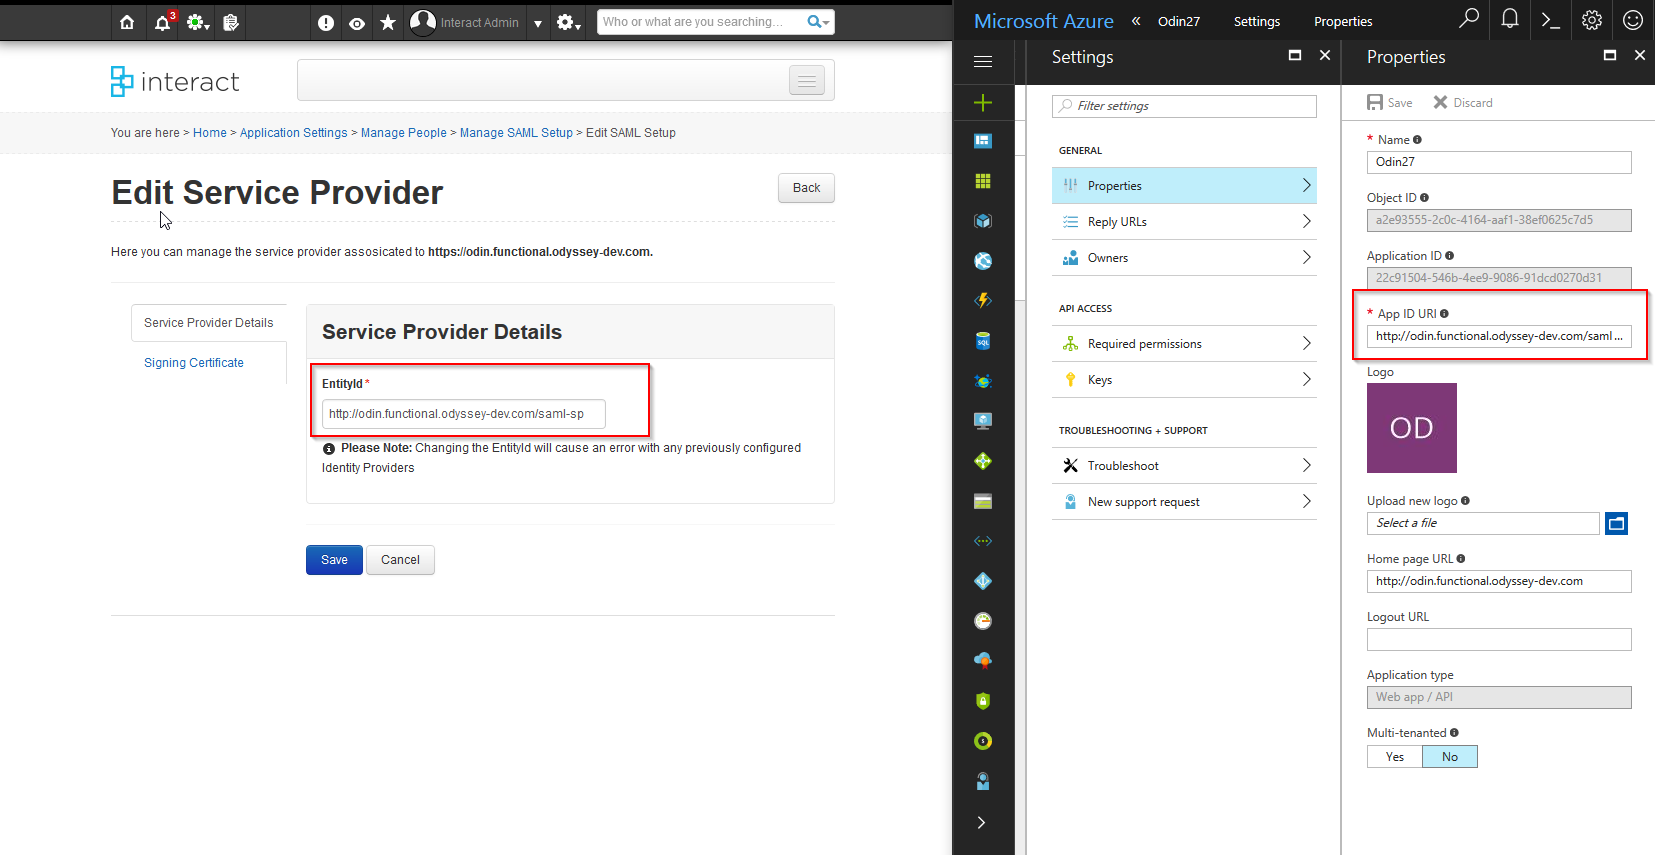
When navigating to the app within Azure, and accessing the 'Properties' for the App within Azure you can access the 'App ID URL' this is shown below and can be added to the Interact App ID URL field. This is your domain followed by /saml-sp
Setting up the Reply URL within Azure
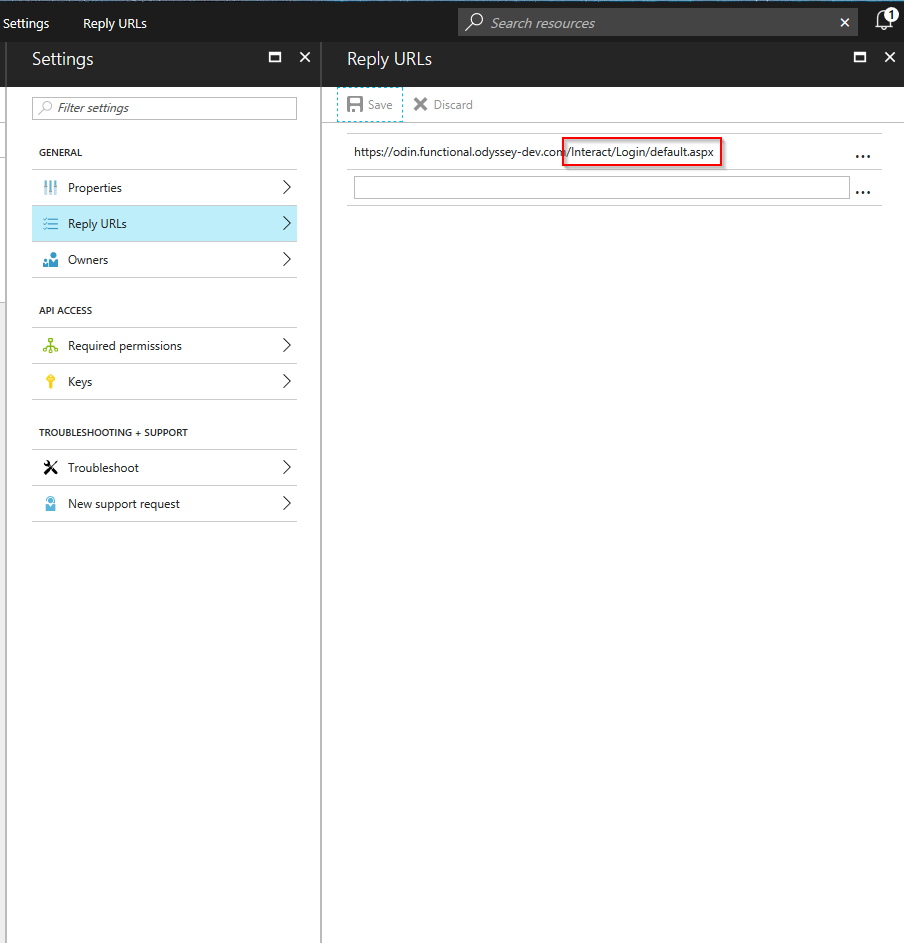
The reply URL will always be the same format, this is [yourdomain]/Interact/Login/default.aspx. Within Azure navigate to Reply URLs and add the URL, an example of this is included below:
Getting the Directory ID from Azure
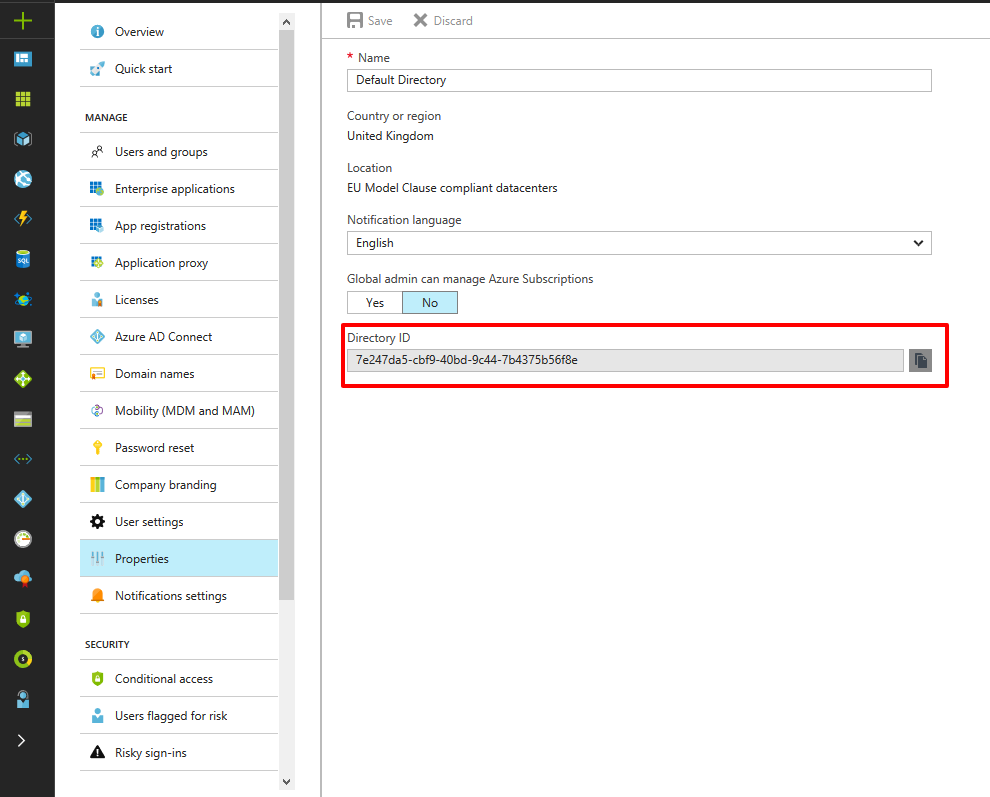
When navigating to the App 'Properties' you can access the Directory ID, copy this and add it to the Interact field.
The 'Configure a Windows Azure source' step within Interact will now be complete, you can now setup the permissions within your Azure app once done you can click 'Store Credentials' within Interact to proceed.
Setting up the required permissions for the Azure App
Within the Azure App, navigate to the 'Required permissions' within the API Access area. Select the Windows Azure Active Directory option and tick the following options:
Application Permissions:
Read Directory Data
Delegated Permissions:
Read Directory Data
Sign in and Read User Profile
Save and Grant these permissions, this step is now complete.
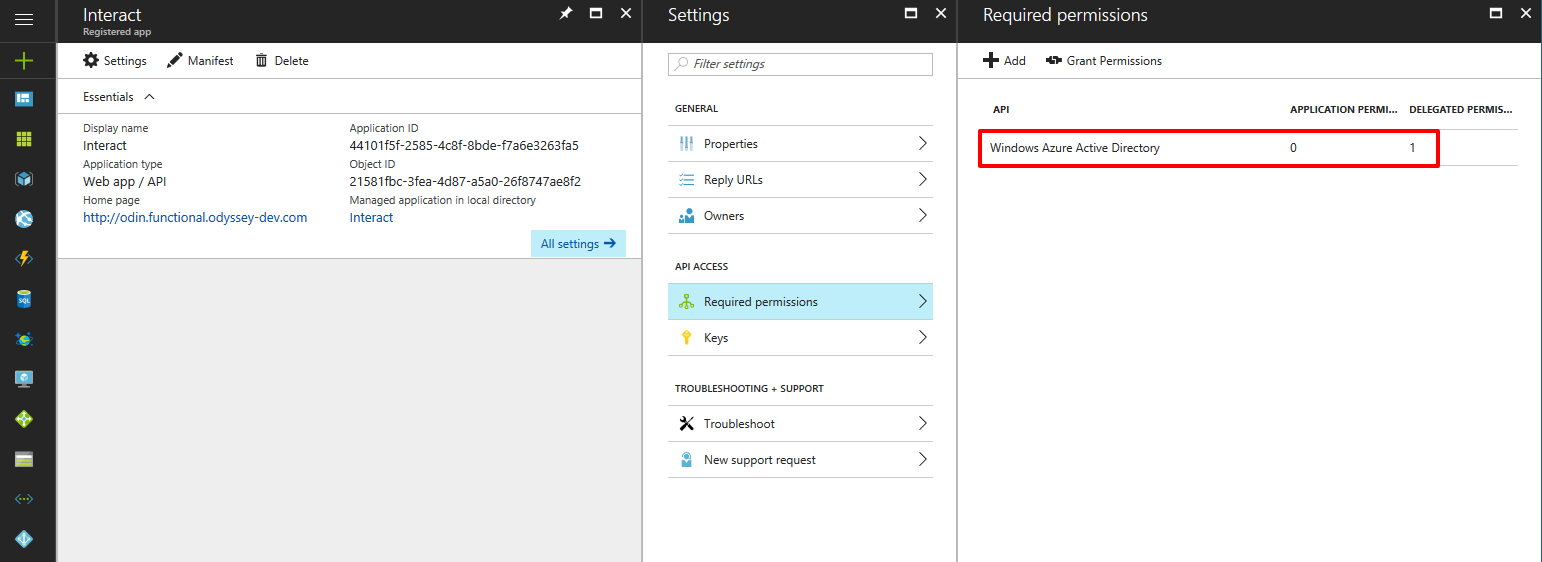
It is essential that once the application permissions have been saved, you click the 'Grant Permissions' link at the top of the required permissions page. Permissions have not been applied until this has been clicked and the integration will not work.
Adding Azure authentication details to Interact
Once the Azure App ID's and Secret have been added to Interact you can now setup authentication credentials, within Azure navigate to the 'Domain names' area and copy the domain name, this can then be added to the 'Azure Domain' field within Interact.
What do you want to name the SAML configuration? - this field is used when within the SAML configuration area within Interact, and is seen if the 'Show provider on login screen' is checked. In the example below I have named this 'MG azure'.
Do you want to show this name on the login page to allow your users to login? - This option will show the name above to users if using the login page within Interact.
Enable auto login for this provider - this option sets the Azure configuration being setup to be used to auto log users in, if this option is enabled at this stage users wanting to login to the intranet must be within Azure. It is recommended that this option remains unchecked until the Azure setup is completed.
Do you want to enable this Azure configuration as the default provider to auto login users? - this option replaces any pre-configured SAML configurations with this Azure configuration as the default, when navigating to the login domain this domain will be used. This can be altered by accessing the SAML configuration screens.
Mapping fields from Interact to Azure
Once authenticated you can select how to map fields from Azure to fields in Interact. All defaults are set within the dropdown fields however this can be updated to match your configuration in Azure. Fields which aren't required for synchronisation can be marked as 'Do not map' this will ignore any field set within Azure.
Note - You may find that some fields are missing here that you have in Azure and want to synchronise in to Interact. Let us know by raising a request within the Product Enhancement forum and we'll be able to investigate this as an iteration on this functionality. At the time of creating this Azure app it was not possible to use any other fields than the fields listed below, this includes Azure's Additional fields.
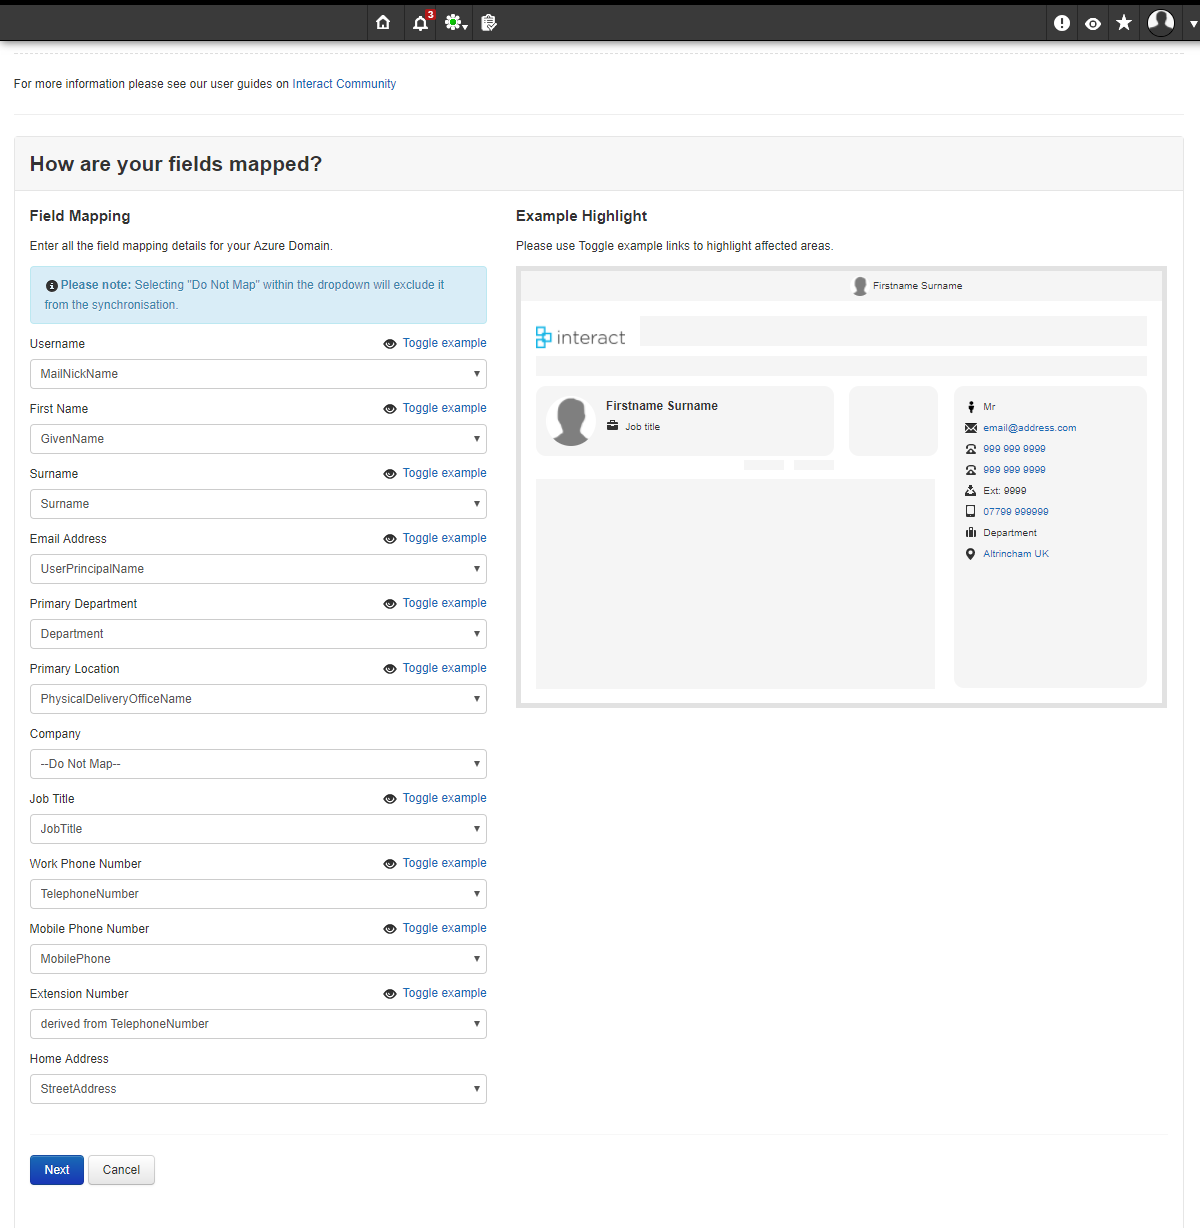
Synchronising of fields between Azure and Interact.
Select to synchronise Departments, Companies and Locations and Manager fields from Azure to Interact. Select which Department, Company and Location to be used if one isn't supplied for a user within Azure.
Select how Interact should handle users which are missing or inactive within Azure.
Interact can handle users in a similar way to how users are handled in Azure, the options for how to handle users which no longer appear in Azure and how to handle users which are marked as inactive in Azure are:
- Deactivate the user within Interact
- Delete the user from Interact
- Nothing I can handle this manually. - this option leaves the user as they are and their configuration isn't updated within Interact.
Select which groups within your Azure to add to Interact
This section lists all groups from Azure and shows the number of users in each group. Select the groups to be imported in to Interact. The screen below is an example of how they will be shown.
Select how often to synchronise with Azure
The user synchronisation will run on a frequency set within the following step at the time specified, select a frequency and to make this Azure source active/inactive then click next.
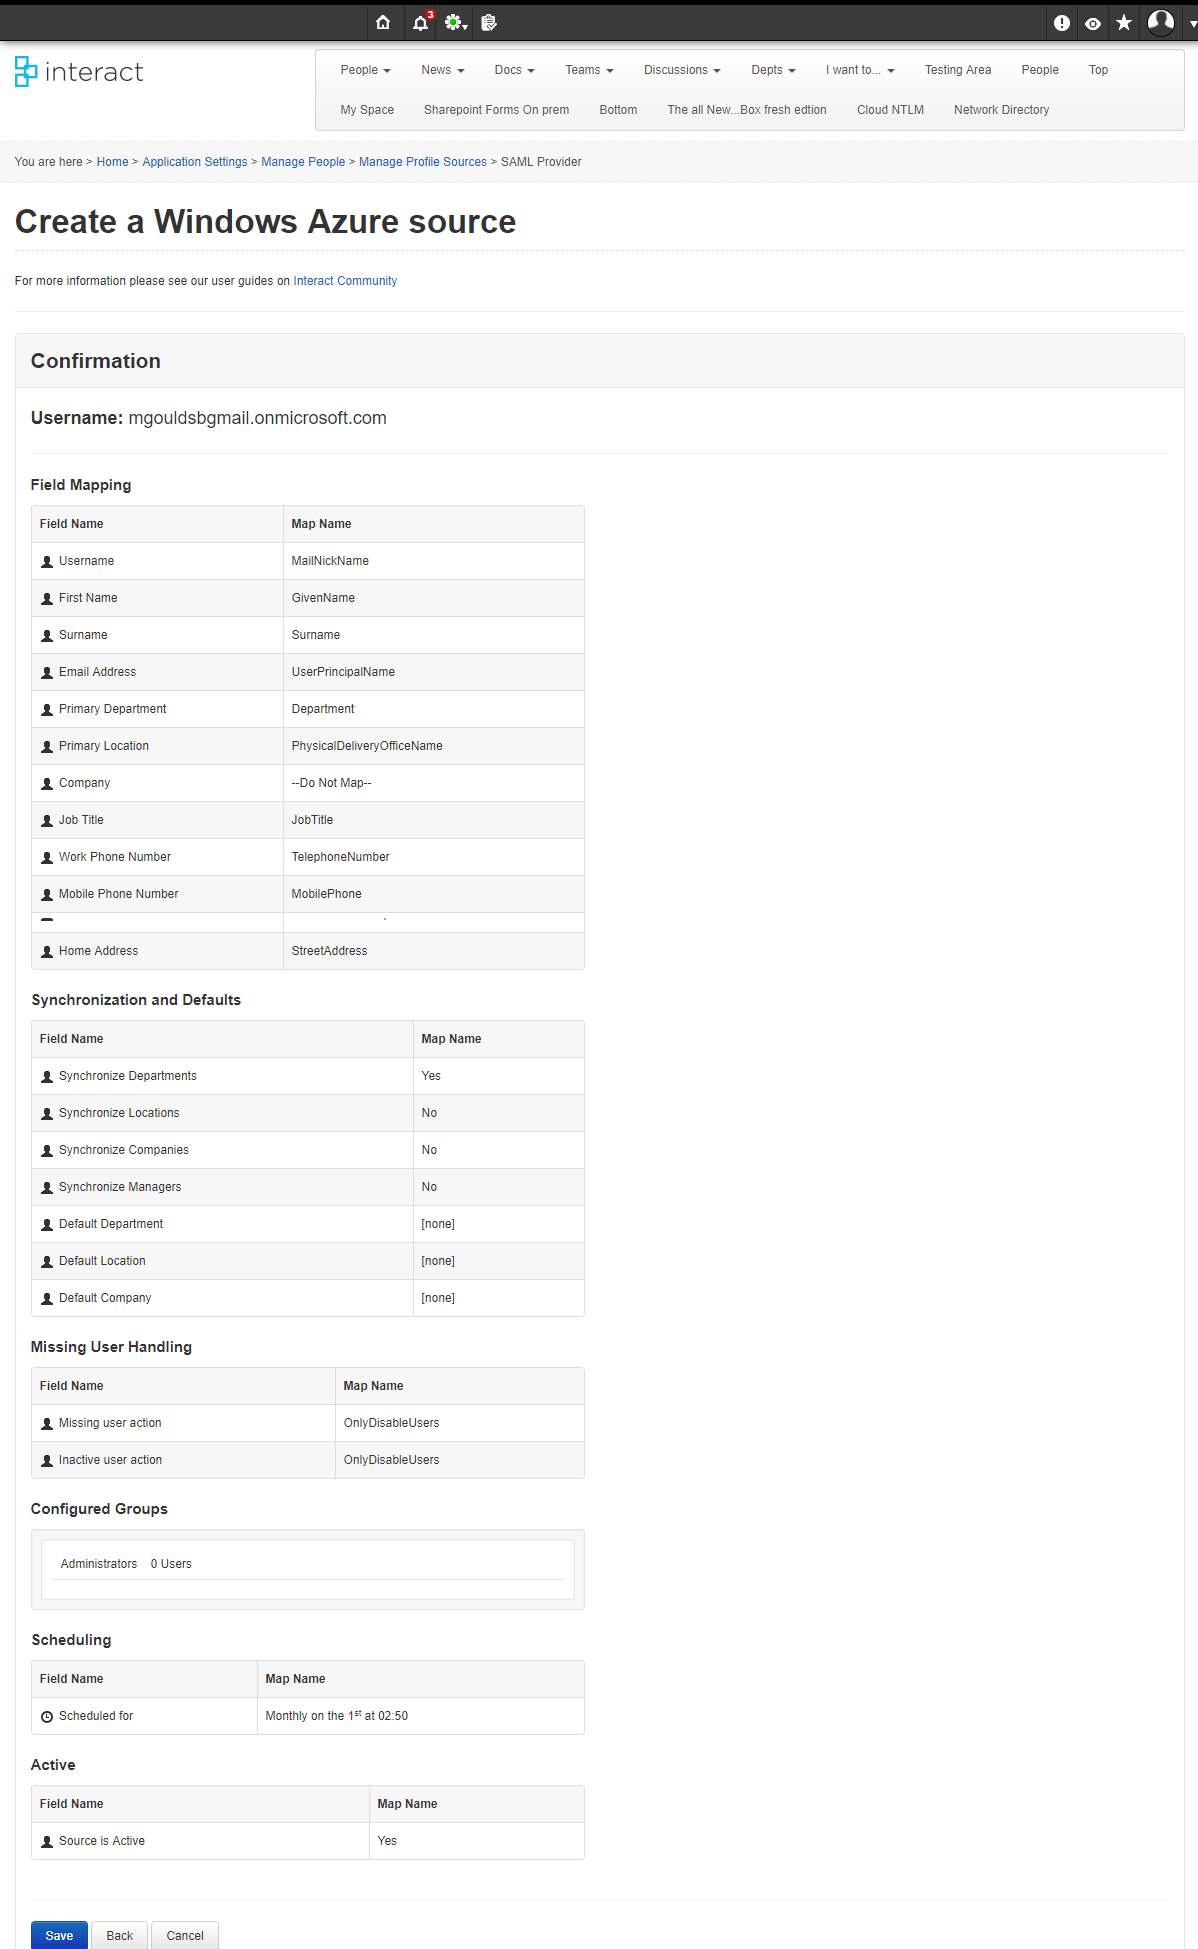
Review and Confirm Azure setup
This section shows all selected options from the previous steps, review the selection and Save to complete the setup of the Azure source.
Updated over 6 years ago
